


You Just Bought a Big Electronic Games Midway Arcade Cabinet. Now What?
You Modify it of Course!
by RetroBlast reader Lane C. with introduction by James McGovern
Introduction
As many of you know I was not very kind in my review of the Big Electronic Games- Midway Arcade game available in Target stores around the country over the holiday season. While I certainly voiced my opinion, others saw value in the price point as well as the smaller size of the unit for the space conscious. Reports from Clay Cowgill which he posted on various newsgroups indicated the product had brisk sales in many locations. So I can assure you that whether or not this game continues to be sold in stores, we will be seeing more of it and I would bet that many transformations have already begun.
One collector on rec.games.video.arcade already posted pictures of a control panel modification that displayed some promise. In my review the controls and the display were the main sticking points. Now, we are pleased to present another round of modifications by RetroBlast reader, Lane C.
Lane has tackled a slew of other shortcomings of the unit and I must say I am impressed with the progress. Below you will find enhancements to the marquee, power switch, the display, and more.
While we all have our opinions about what is worthwhile and what is not etc. Not many of us would be in this hobby if we were REALLY thinking clearly. It is in this spirit that we acknowledge Lanes's hard work and congratulate him on a job well done.
James McGovern
Modding the Midway "Target" Cabinet
Raising the Base
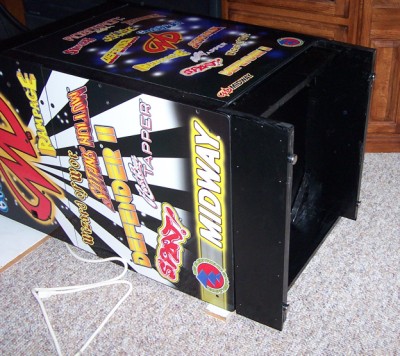
The cabinet was only 33 inches from the floor to the controls and you really had to look and lean down to play. I raised the unit with a base by 6 inches to bring the controls up to 39 inches - right where most controls are.
I did this by making a box out of 1" thick lumber that fits the interior of the inside of the bottom of the arcade cabinet. In order to make it flush with the outer sides I glued and stapled on pieces of 3/8" pine to make the little step you see.
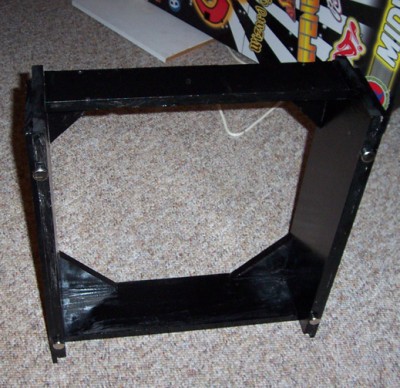
I made a partial front skirt with room for your feet to protrude underneath, and then made a slightly taller one for the back but still left a gap. The entire structure was strengthened by placing corner braces on the top interior of the box.
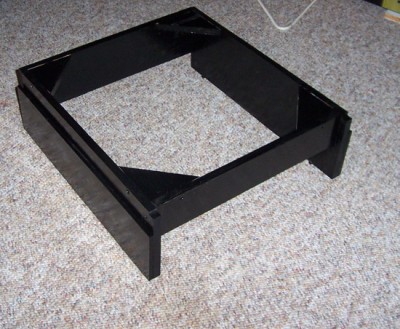
The final touch was to notch the top front slightly to clear the bottom of the cabinet's door. The 3/8" pine only came in 5-3/8" (or maybe it was 5-1/2".. I know it was less than 6") - so to get the extra fraction of an inch and to make it easier to move (slide on on carpet) I hammered in little stainless furniture glides. I think the finished product with 2 coats of black Rustoleum looks pretty good!
No Marquee Light? I Don't Think So.
I mounted a cheap $8 fluorescent light I purchased from Lowes. I also placed a scan of the original marquee between 2 pieces of Plexiglas that I had cut from 1 piece - also purchased and cut (for free) by Lowes for 8 dollars. I then ran some black electrical tape around the edges to give it a frame and hold the two halves together. In order to mount it to the cabinet, I super-glued one half of of a pair of tiny 3/8" brass hinges to the plexiglas and used the included tiny brass screws to secure the other half to the top 3/8" wood of the cabinet.
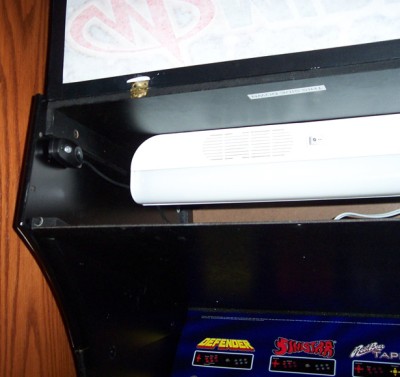
I really think this was a nice touch for the price. My only wish is that I could make the marquee with a single piece of paper and not have any seams. It is longer than a single piece of paper and I have a tiny 1/16"-1/8" overlap where it makes a tiny line that is darker than the rest. I likely will make a new insert to put in there at a later date.
Power to the Speakers
I also bought a powered speaker system with subwoofer (Labtec Pulse 285) from Meijer and placed them in the header area behind the now lighted marquee. It only cost $17 and made the sound MUCH better where you can actually feel some audio and and even has a remote power and volume switch.
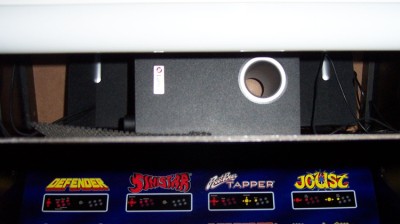
To make the connections I unplugged the male RCA phono sound jacks from the back of the switch (on the inside of the cab) and I used a standard sound blaster type 1/8" male stereo adapter to convert the stereo 1/8" male plug to 2 RCA phone jacks... essentially a Y cable. In order to connect the male end of this adapter to the male cord from the Labtec speakers I used a 1/8" stereo female to female adapter from Radio Shack - I think it was $2.99 or $3.99. This way it requires no cutting striping or soldering - real simple and flexible.
