

Modding the "Target" Midway Cabinet continued: Final Update
| < Previous Page |
|
Here we are with the 3rd and final update (for now) to the Midway modifications
Lane C. has performed on his "Target" Midway Arcade Cabinet.
You may remember that we left the last installment with a promise from RetroBlast! to Lane that we would help him aquire a replacement marquee so he would not have to suffer through the inkjet copy which was split into two pieces with a seam down the middle.
We made some inquiries and Mike from Classic Arcade Grafix stepped up to the plate to provide a replacement for Lane's project.
Many thanks to Lane for including us in his project and a very big thank you to Classic Arcade Grafix for his assistance in getting Lane some decent artwork for his cabinet.
I give you the final installment as told by Lane C. on his thoughts about the marquee from Classic Arcade Grafix.
- James McGovern
Replacing the Midway Marquee
by Lane C.
March 2006
Classic Arcade Grafix did a great job. It was nicely packaged and arrived in excellent condition without ANY damage.
The marquee itself is very nice as well... they did a good job of placing, sizing, and printing the graphic I provided to them. The size I requested for the finished product was SPOT ON!

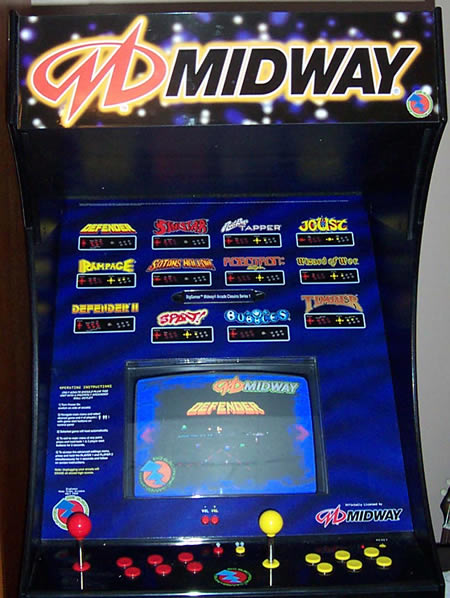
Marquee installed with no backlight
I opted for the styrene material. It is very nice and needs nothing added to be put to use. I placed it right where the original marquee was - just had to super glue my little brass hinges on it. The reproduction is so good, that if the marquee is not lit - you don't realize it's not the original wood (non lighted) one.
The styrene material seems durable and break resistant, the only down side is that it really eats light - they warned me about this when I placed the order - very thoughtful of them. I pressed on as I didn't want to have to make a frame - I just wanted to place the marquee like the original was.

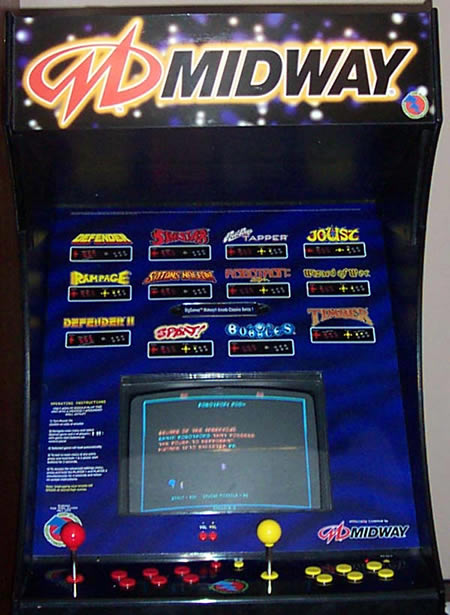
Marquee installed with backlight turned on
I had a cheap fluorescent light for my home made marquee that had seams... it barely gave any light through the new marquee, so I had to pop in a brighter light.
I was concerned that it would be costly to put something in there that would give off enough light, but I managed to do it for under 20.00!
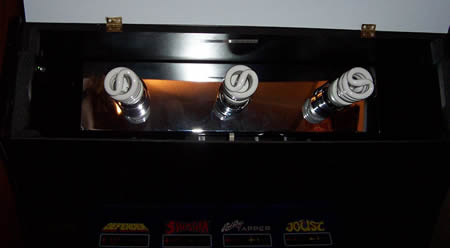
I settled on a 18" 3 bulb vanity light bar (like what goes above a bathroom mirror) from Lowes for 9.99, stock number 73400. It has a highly polished chrome finish that really does a great job of reflecting all the light towards the marquee.
For lights, I was really worried about putting too much
wattage (read heat) in the fully enclosed marquee area - so I looked for
a creative solution... I ended up buying a 4 pack of screw in fluorescent
bulbs for only 7.98, again from Lowes, stock number 146558. They are only
13 watts each, but crank out 800 lumens of light - comparable to a 60
watt bulb. So, you get all the light, without all the heat. It is a nice
cheap
solution!

Homebrew marquee lighting
I have included pics of the marquee with it on and off (can't tell much difference due to the camera's flash) and one showing the vanity bar light with the fluorescent bulbs in place.
I'm very satisfied with the marquee, Hats off to RetroBlast and Classic Arcade Grafix!

