


Doctorin' The Tardis:
The Doctor
Who Pinball MADLights Mod
by Kevin Steele
June, 2004
I am a very proud owner of a 1992 Bally "Doctor Who" pinball machine (that much should be obvious by now!) I've got a very nice condition pinball, and like a proud car owner, I've started tweaking and fine-tuning my machine. A "mod" (or modification) was inevitable.
I decided that I wanted to add some special lighting for the Time Expander multiball mode, as the Dalek target holes seemed under lit and, well, boring. This is a mode that takes locking two balls, hitting "ball" targets 15 times, and finally shooting a target hole just to activate. It should have some really great "razzle-dazzle" lighting.
From the outset, I decided that the mod had to be fully reversible — while I may think the mod is cool, another pinball collector may not, and I didn't want to do any damage to the machine just to install the mod.
After scouring the Internet for months, and two failed attempts with other lighting products, I finally settled on a PC lighting mod called MADLights: it's a custom circuit board with four lighting modules, each consisting of 3 different colored LEDs.
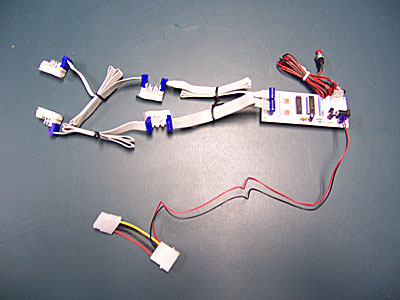
The MADLights Lighting Kit
The MADLights kit had several features that made it ideal for this project: first, it is LED-based lighting, meaning I could mount it practically anywhere without fear of heat issues or having to change bulbs once it was installed. Second, it's a 12-volt device, so power was available from the machine's power driver board, and the MADLights had a detachable power cord, so I didn't have to cut it apart to wire in a custom power cable. Finally, the lighting modules were on long ribbon cables, allowing me to mount them where I needed to without desoldering the LEDs and wiring up my own extension cables.
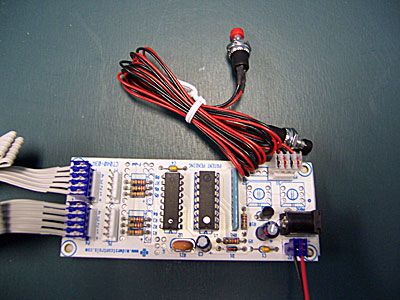
The MADLights Main Board
One of the nice things about the MADLights board is the fact that there are 10 different animated light patterns to choose from, along with a number of different speed settings. The red button switches between the animation patterns, and the black button adjusts the speed of the animation. The unit remembers the last setting even when powered down, making it ideal for this application.
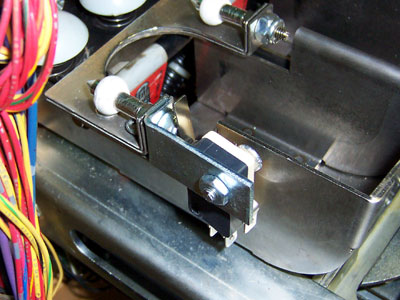
I needed a way to switch on the MADLights only when the "Time Expander" mini-playfield had risen to full height. A microswitch seemed ideal for this, especially since I had a number of microswitches laying around from my joystick reviews. I found a great spot for the switch on the left side of the Time Expander. All I needed was a custom bracket to mount the microswitch 1" below the bottom edge of the left-most bumper post.

The mounting bracket installed and ready for the microswitch
I used a simple 2" hardware brace, put it in a vice, and bent it with a hammer (yeah, real high-tech, right?). A little dremel work to ensure that the edge of the brace didn't interfere with the ball path, and I had just what I needed to activate the lights.
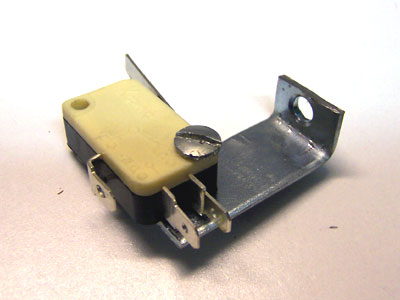
The completed switch assembly
The mounting of the switch assembly worked out better than I hoped — the bracket was exactly wide enough to fit the microswitch. It was almost as if the mini-playfield had been designed to accept this mod.
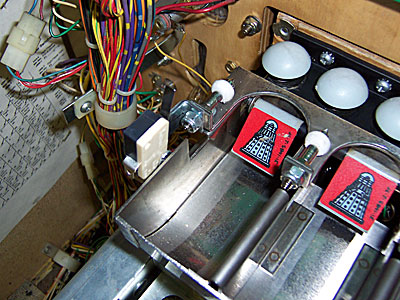
The intial switch installation
I did discover that, since the microswitch only mounted with one screw, that the switch "pivoted" a bit when it engaged. I ended up moving the mounting screw to the mounting hole on the other side of the microswitch, which meant the front of the microswitch was now flush with the front edge of the mounting bracket.
The end result was perfect: the microswitch only activated when the Time Expander was at the top range of motion, and the switch assembly didn't interfere with either the ball path or the motion of the mini-playfield. In addition, the microswitch didn't move or loosen at all.
The revised microswitch mounting
All that was left was to create the power cable. I ended up creating a custom 5' long cable, with alligator clips on one end to connect to the power test points on the WPC driver board, and .187" quick-disconnect tabs on the smaller "switch cable" that extended from the power cable (which connected to the tabs on the microswitch).
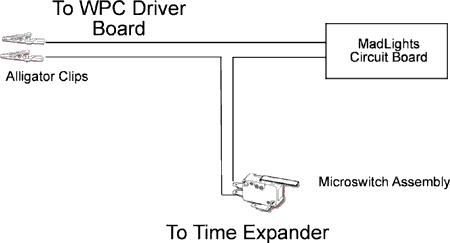
Power cable schematic
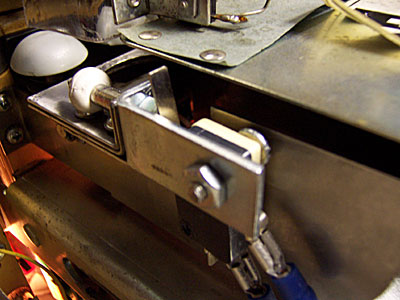
The microswitch is hooked up and ready for action
