


Phase II: From the Ground Up — Construction
9/23/03
Well, after what seemed an eternity (and was actually just two months), I now have the SlikStik Arcade Machine, a "some assembly required" arcade cabinet. It arrived in several very large boxes on one very large truck.

Three Very Heavy Boxes
Just looking at the excellent packing job, I knew right away that a lot of thought went into this cabinet. There are about 15 major pieces to the cabinet, and everything is designed to lock together using "outrigger cams," meaning that it can be assembled and disassembled using just a screwdriver.

Everything You Need For Arcade Nirvana
9/24/03
Assembly of the cabinet took less than an hour, and that was with me taking my time and taking lots of photographs.
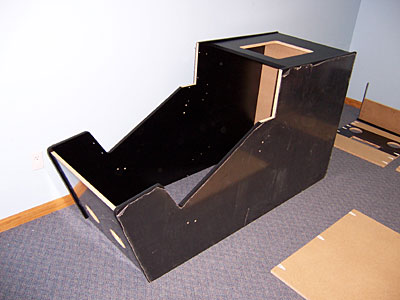
Putting it All Together
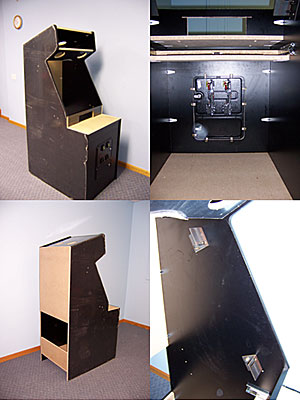
Assembly in Progress
(The "scratches" on the sides are the protective plastic
coating!)
As this was the first unit off the assembly line, so to speak, there were some things that weren't ready when the cabinet was shipped — the marquee plexiglass and mounting bolts for the D9200, for example. I had to wait a few days to get everything I needed.
10/01/03
I received the parts I needed to mount the SlikStik and the D9200 arcade monitor today, and of course got right down to work. All I need now is the marquee and marquee plexiglass and the cabinet will be finished.
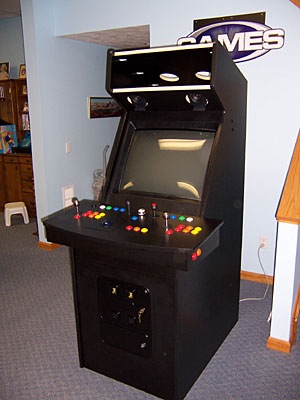
Almost Finished
10/02/03
I've installed the speakers. These are Sony XPLOD speakers (the particular model has been discontinued, but just look for the 5 1/4" version). One of the nifty things about these speakers is the translucent red plastic cones, which allows the speakers to "glow" from the marquee light behind them.

Sony Speakers Ready to "XPLOD"
The speakers are hooked up to a Creative Inspire 2.1 PC speaker system, which has the amp in the subwoofer. Basically, to hook up the car speakers I simply cut off the existing Creative satellite speakers and wired up the car speakers.
The satellite speakers attached to the subwoofer using standard RCA jacks, so I suppose I could have just gotten some RCA plugs for the Sony speakers, and not had to chop apart the existing speaker wires, but I didn't have any RCA jacks handy, and I wasn't going to need the Creative speakers afterwards (hacking them apart was "quick 'n dirty", but it worked!) The Sony speakers had the same 4 ohm impedence as the Creative speakers, so it was a proper match.
One thing you need to check when wiring things up, though, is the polarity. The speakers have positive and negative terminals, so check and make sure that you're wiring things up correctly (I don't think you'll blow your speakers, but they may not sound right.)
The sound is incredible (and a bit loud!). I've placed the volume control pod that's included with the Creative speaker setup on the back corner of the SlikStik, for easy reach. I just had to route the cable in the small gap between the back of the controller and the cab. It worked like a charm.
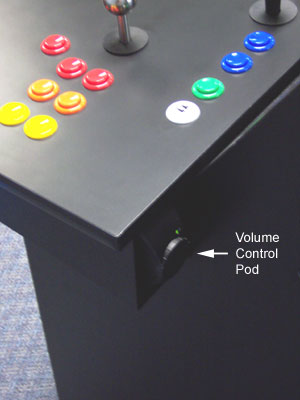
Volume Control Within Easy Reach
10/8/03
Time for the marquee. The light fixture I picked is a generic 25" fluorescent light fixture (I think the tube is 22"), that fits just perfectly (I've even got an extra outlet on the fixture, if I need it!)
I installed it by putting two "L" brackets into the top panel of the cab, the screwed the fixture onto the brackets. The fixture is about 5-6" back from the marquee, and the light distribution is perfect.
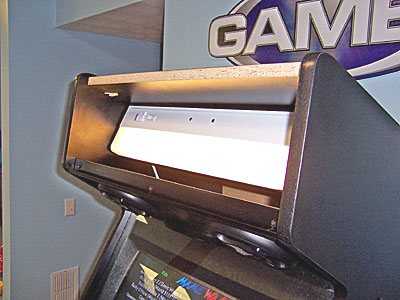
The Installed Light Fixture
One mistake I made — I used 3/4" screws on one side, and the tips of the screws poked out the top of the cab, marring the formica surface. You don't see it unless you're up above the cab, so not a real biggie (unfortunately for me, however, my cab is right next to the basement stairs, so I see it every time I come down to the gameroom!)
I've put a temporary marquee in place (I printed out three pieces of glossy inkjet paper, and stuck them in front of a scrap piece of plexiglass — we're talking real "class" here!) This is pretty much the final bit of construction, at least until I can get a final marquee in place:

The Finished Cab
12/22/04
Finally! I've added a real marquee to the cab.
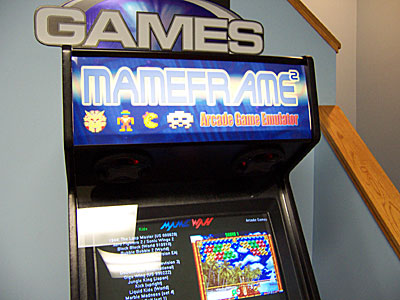
The Custom Marquee
I got my custom marquee printed by Classic Arcade Grafix (review here), and I couldn't be happier with the results. It's a really great print job, and the colors are amazingly vibrant when backlit.
The marquee is "sandwiched" between two 1/8" pieces of plexiglass (which come with the SlikStik cab), which helps keep the marquee flat.
1/26/04
Coin Door Lights! I finally got around to ordering some LEDs (from SuperBrightLEDS.com) to use in the MAMEframe2's coin door lights. These LEDs are "drop-in" replacements that fit the same "T3-1/4 Wedge Socket" as the original #161 lamps that were included with the Happs coin door.

The Coin Door Lights, Rigged and Ready for Action
To power the coin door lights, I wired the sockets in parallel and connected them to the yellow (12V) and black (ground) wires on a standard PC molex connector (I cut the molex connector off an old 80mm PC fan I had in a box — it included a "pass-through" connector so I could also plug in the trackball light power cable I had rigged up).
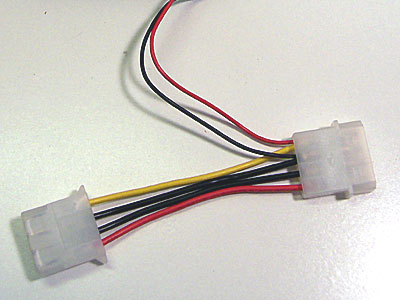
The Molex Connector, Wired for 12V Power
This allows me to just plug the lights into the PC's power supply. I pulled one of the cables from the PC power supply out of the back of the computer through an open PCI slot (I removed the cover), allowing me to plug in both the coin door lights and the trackball light to the PC's power supply.
I've documented the entire procedure, so if you're interested check it out.
3/25/04
I got tired of getting out the coin door key every time my youngest son wanted to play one of his educational CD games on the MAMEframe2 (and honestly, who can blame him for wanting to use the arcade machine — Reader Rabbit looks absolutely killer on the 27" D9200!)
My solution? I got a slimline external DVD/CD-RW drive for the MAMEframe2, and mounted it with velcro inside the keyboard drawer.
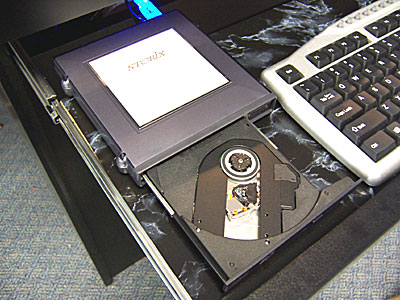
Slimline DVD/CD-RW Installed (Note Cool Blue Glowing USB Cable!)
While the cab already had a combo DVD/CD-RW drive, this is a lot more convenient, and since it only measures 5.37" x 5" x .75", it fits great. While I was at it, I got some black marble contact paper to cover the unfinished drawer. I would have preferred just plain black, but apparently not many people want plain black shelf paper.
4/16/04
I finally got around to ordering the 4-LED red lamps I wanted for the coin door lights (see the SuperBrightLEDs review). The results are great, and that takes care of one more minor detail on the cabinet:
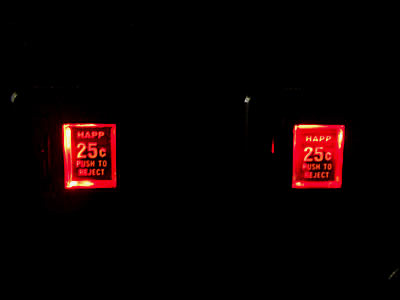
The Coin Door Inserts, Lit by Ultrabright Red LED Lamps
Phase III: And Now, the Brains — Software (Coming Soon)
