


| < Previous Page |
|
There are several test points on the WPC power driver board, including a 12v test point, which was perfect for my power needs, as the MADLights board requires 12v. I connected one alligator clip from my custom power cable to the 12V test point (TP3), and the other to the ground test point (TP5).
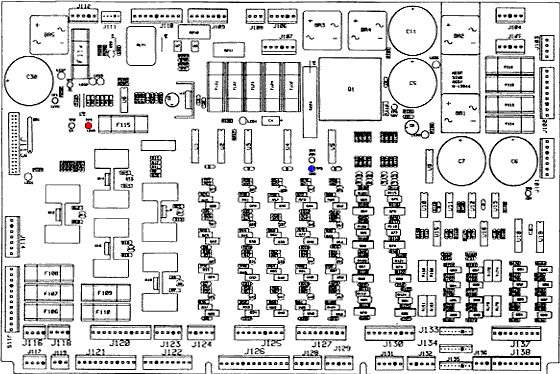
WPC Power Driver Board Test Points: 12V (TP3) in Red, Ground (TP5) in Blue

The alligator clips, attached to the ground and 12v test points
Once I had the power cable in place, I needed to place the MADLights board and the LED modules. I found a nice empty space on the underside of the playfield near the mini-playfield for the board, and there was just enough space between the time expander light matrix and the time expander itself to fit three of the LED modules. I had to remove the expander ball return ramp to install the lights.
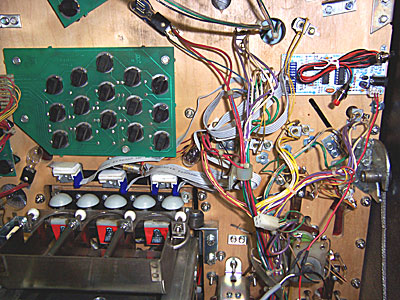
Board and LED mounting
I used velcro to hold both the main MADLights board and the LED modules in place. This allowed me to avoid having to screw anything in to the underside of the playfield and also gave me the ability to reposition things should I need to.
I positioned the three LED modules in front of each of the three "Dalek" targets in the time expander. The ball troths are made of brushed stainless steel, and are actually highly reflective. This was what I was hoping for, as the LEDs are actually pointing away from the player, and the reflective metal "bounces" the light back, creating a glowing effect behind the Dalek targets.
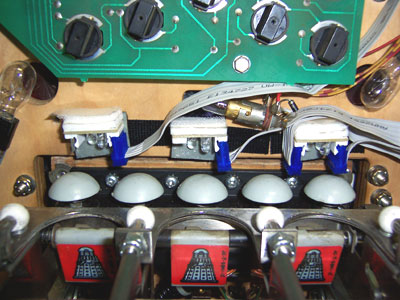
LED Module mounting
The final LED module I orignally installed in the top dome of the time expander, and routed the cable down through the expander itself. You couldn't really see it in action, however, as the #44 GI bulbs and the flasher tended to overpower the LEDs. I have since found a new home for the fourth module: inside the "Tardis" ball ramp.
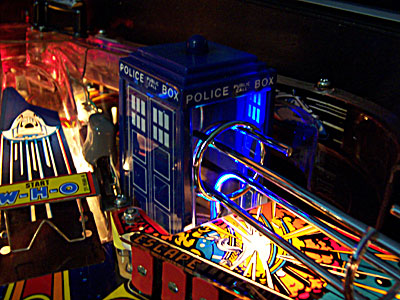
The interior of the Tardis glowing during multiball
Since the Tardis is where all the balls pop out when you've hit a Dalek hole, this seemed a fitting place for the fourth module, and now you can finally see the lights from the fourth module!
After installing everything, I was ready to test it. Going into the game's diagnostics, I raised the mini-playfield. It worked perfectly the first time!
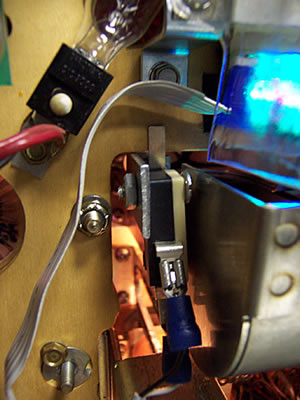
The microswitch makes contact
Amazingly enough, I didn't have to make any adjustments, and the mod has worked like a champ from the very first test. I did scrape a knuckle installing the switch bracket, which I actually consider good luck — for some reason, every project I've bled for has worked out great (I consider it my "blood sacrifice" to the gods of electricity ;-)
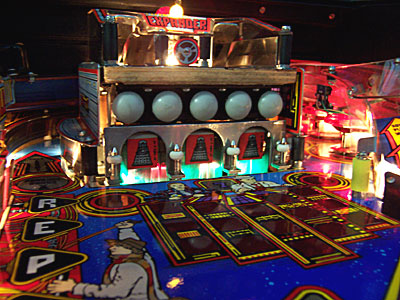
The Time Expander Illuminates!
The lighting effect from the MADLights is wonderful — it's very bright, and the pulsating, strobing animation patterns really add a great touch to the time expander. In addition, the bright lighting illuminates the Dalek "fly-away" targets, helping them stand out when they had previously been hidden in a gloomy darkness.
I don't know if I really needed 10 different animation patterns, but it's nice to know that if I ever get bored of one pattern, a simple push of a button can set up a different one. There's even a setting that cycles through all ten settings. MADLights sells for $79.95, which is the one downside to this mod — it isn't exactly cheap. Still, the effect is precisely what I was looking for, and the quality of the MADLights unit is exemplary.
The effect of the lights in action really has to be seen to be fully appreciated. Click on the video link below for a video of the MADLights mod in action (and yes, the song in the background is the instrumental version of "Doctorin' The Tardis" ;-)
