

Modding the "Target" Midway Cabinet continued
| < Previous Page |
|
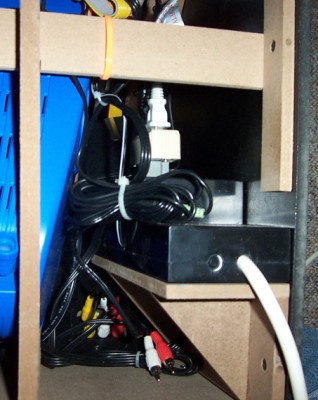
Control the Power
The power unit in the cabinet is a normal surge suppressor/filter
power strip enclosed within a custom molded plastic enclosure. The raised
part is just an accommodation for a Wall wart transformer that provides
the DC power for the electronics module. It's the type of transformer
that has a plug right on it (no cord in between) and goes directly into
a 120 outlet and just hangs on the wall by the plug. The enclosure on
the midway power strip has a big square bulge in it, underneath is one
of these wall wart transformers. It supplies the 12 volts to the electronic
module.
I removed the screws that kept the TV plugged in and
plugged in a 3-prong adapter (to raise the connection) and then plugged
in a 3-way outlet adapter so the external
switch can power everything. You could also remove the entire plastic
housing and just use the power strip.

The Finale: Locating Lost Pixels
I recieved a remote for the monitor from Big Games. This enabled me to make all kinds of settings changes to improve the display. The improvement, while not making everything accurate is nonetheless, a dramatic improvement! I was able to get more and much better colors, better contrast, less glare, more clarity, and an all-around better picture.
Here are the settings I used:
Color: 100 (normal was 50)
Brightness: 40 (normal was 50)
Contrast:30 (normal was 50)
Sharpness: 100 (normal was 50)
Tint: -30 (normal was 0)
Blue (special setting): off (I think normal was on)
Red (special setting): on (I think normal was on)
Color Temp: Warm (normal was normal)
Below you can see the end result of the finished modifications. If anyone wants to duplicate what I have done and needs exact dimensions, let me know and I will be happy to send them along.
RetroBlast Reader
.jpg)
Update: New Pictures of Another Builder's Mods to Replace the Control Panel
Another "Target" Midway cabinet owner who created a much needed modification to the control panel has made these pictures of his work available to RetroBlast.
.jpg)
The builder has replaced the stock controls completely with a wooden contol panel surface as well as actual arcade quality joysticks and buttons. You will notice he reduced the number of buttons for each position from six to two on the left and four on the right. Now he is all set for Defender and Stargate and it certainly looks much cleaner.
.jpg)
The creator of this modification also writes in to tell us that he is making additional panels for other Midway cabinet owners and to his surprise there is quite a demand. If you are looking to upgrade and update, the controls are a great place to start in my opinion. The two areas I found the unit lacking in the most were the display and the controls. Like Lane, Bill also contacted the cabinet's manufacturer and recieved a remote control unit for the display which seems to improve the experience.
.jpg)
You can contact Bill by email if you are interested in having a control panel made for your Big Electronic Games Midway cabinet. [Bill's Email]
Also be sure to check out his website containing additional pictures of his work to be posted soon. [Bill's Website]
Conclusion
It should be noted that Lane was a major contributor to the review we originally ran for the Midway cabinet. He provided the RetroBlast readers with the "inside scoop" as it were in the form of interior photos and commentary about his thoughts upon opening the game. You can see part one and two that review in our hardware reviews section.
While Lane does not know it yet, in recognition of his efforts on the review, his work with this cabinet and of course his excellent article about the modifications, the RetroBlast team will be springing for a marquee to be printed with the design of his choice by one of the reproduction artwork vendors that grace our pages. You just can't have a dang seam on your marquee! Great work Lane and thanks for sharing your progress.
James McGovern
